Description
Description :
Ever thinking about set up a music radio station yourself? I think it would be great if you could build a music station and share your music with others. Pretty cool, right?
This module could modulate your voice on the FM radio wave(70-108 MHz). And anyone who has a radio device could receive it. We build everything on this module, which makes it very easy to build a tiny radio station. We also reate library for Arduino to work with this module.
Characteristics:
*It is conceived audio interface, and used for microphone or audio wire signal.
*It is tension flea, tension is broad and stability.
*He is practical for group frequent and signal of entrance with five buttons.
*Audio entrance signal regulating of amplitude and microphone regulating of sensitivity.
*Wireless FM audio microphone stereo-transmission FM radio small power.
Specifications:
*I2C interface 5V TTL compatible
*Arduino plug and play
*Onboard MIC
*VCC Input: 3.0V ~ 5.0V
*Antenna port on the board,Any metal line about 75cm can serves as an antenna.
*FM range from 70-108 MHz
Getting started with FM transmitter Module V2.0
In this Tutorial we are going to see how we can transmit our voice or audio music so that someone who have a radio receiver can receive that voice or music, simply we are going to make a simple FM radio station, whereby we are going to interface the FM transmitter Module V2 or V1 with Arduino UNO
Step1: Hardware required
the following are materials needed to finish our task:
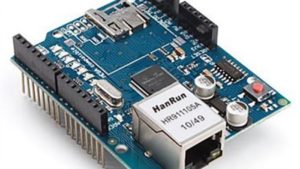
- Arduino UNO
- FM transmitter module(V1 or V2 by elechouse)
- Jumper wires
Step2: Connecting the hardware
Take the FM transmitter module and male to male jumper wire solder the male to male jumper wire on the FM transmitter module as shown on the picture below

after soldering the antenna add pin header at the following pins of the Module; Vcc, GND, SDA, SCL. and after make sure that you have an antenna of 75 cm(add on the many jumper wire). connect the FM transmitter module on the arduino UNO using I2C communication as shown on the below picture


Take your male to male AUX cable and connect to the FM transmitter module and on computer or other music provider but for me it’s on computer as shown below


We are now ready to make the sketch and make our first test using FM transmitter module
Step3: Setting the Library
we will need the FM transmitter module library and you can download it from here. after downloading the library extract it in the arduino library folder and reopen the the arduino IDE.

Step4: Uploading the sample sketch
open the file>examples>FMTX>fmtx_demo. as shown on the picture below

Upload the sketch by default the operating frequency is 90Mhz,

after uploading take your radio receiver and put on 90Mhz frequency your will hear the voice or the music your are playing using your AUX cable or the microphone

!! that’s it! but before doing this make sure you have the permission because in many countries it is illegal to make your radio station without government permission.